How To Setup A Wireless Profile On Windows 7
on most of Windows versions, the wireless bar is located at the right hand side of the system bar, close to the system clock:
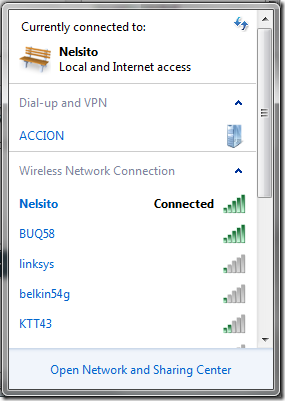
If you click on the wireless bar, the currently available wireless window come up:
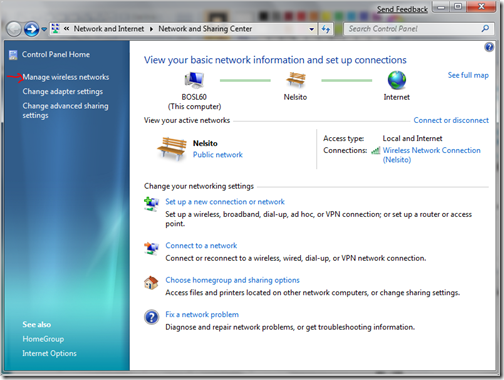
click on “Open Network and Sharing Center” that should bring you to the control panel network management utility:
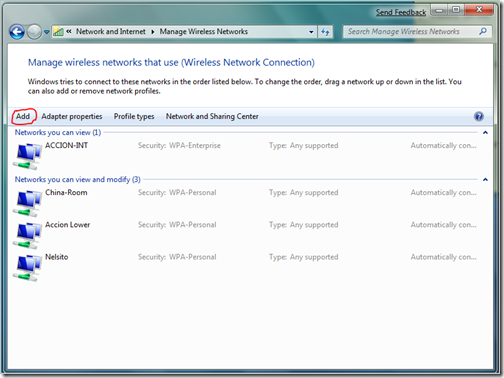
click on “Manage wireless networks” as my nice arrow indicates (:> clicking on that should bring you to the wireless network utility, click on Add:
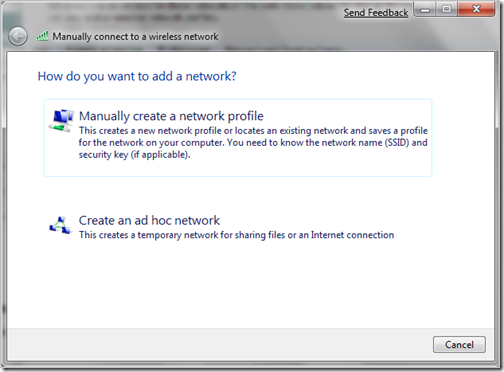
The manually connect to wireless wizard will come up. click on Manually create a network profile:
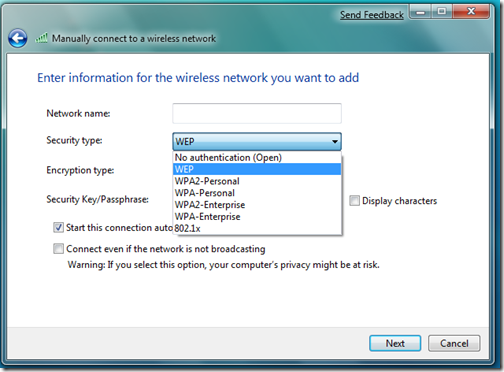
Enter the wireless access point on the next window that comes up:
Enter your settings accordingly, and if you wish to, check the “Start this connection automatically” click Next after entering your information. and that should setup the local profile for your wireless on your laptop.
ConversionConversion EmoticonEmoticon